


D365 CS: Spice up your case forms with new controls! | Part 2

In my last article and the article before that, I discussed a few of the new PCF controls that became available for Dynamics 365 Customer Service. In this article I am going to wrap up this topic and discuss the remaining PCF controls that you can add to your custom or out of the box case forms in the Customer Workspace app. You might have thought that I covered a lot of the controls already, but there are still a ton left, which I will discuss in this article!
Due Activities
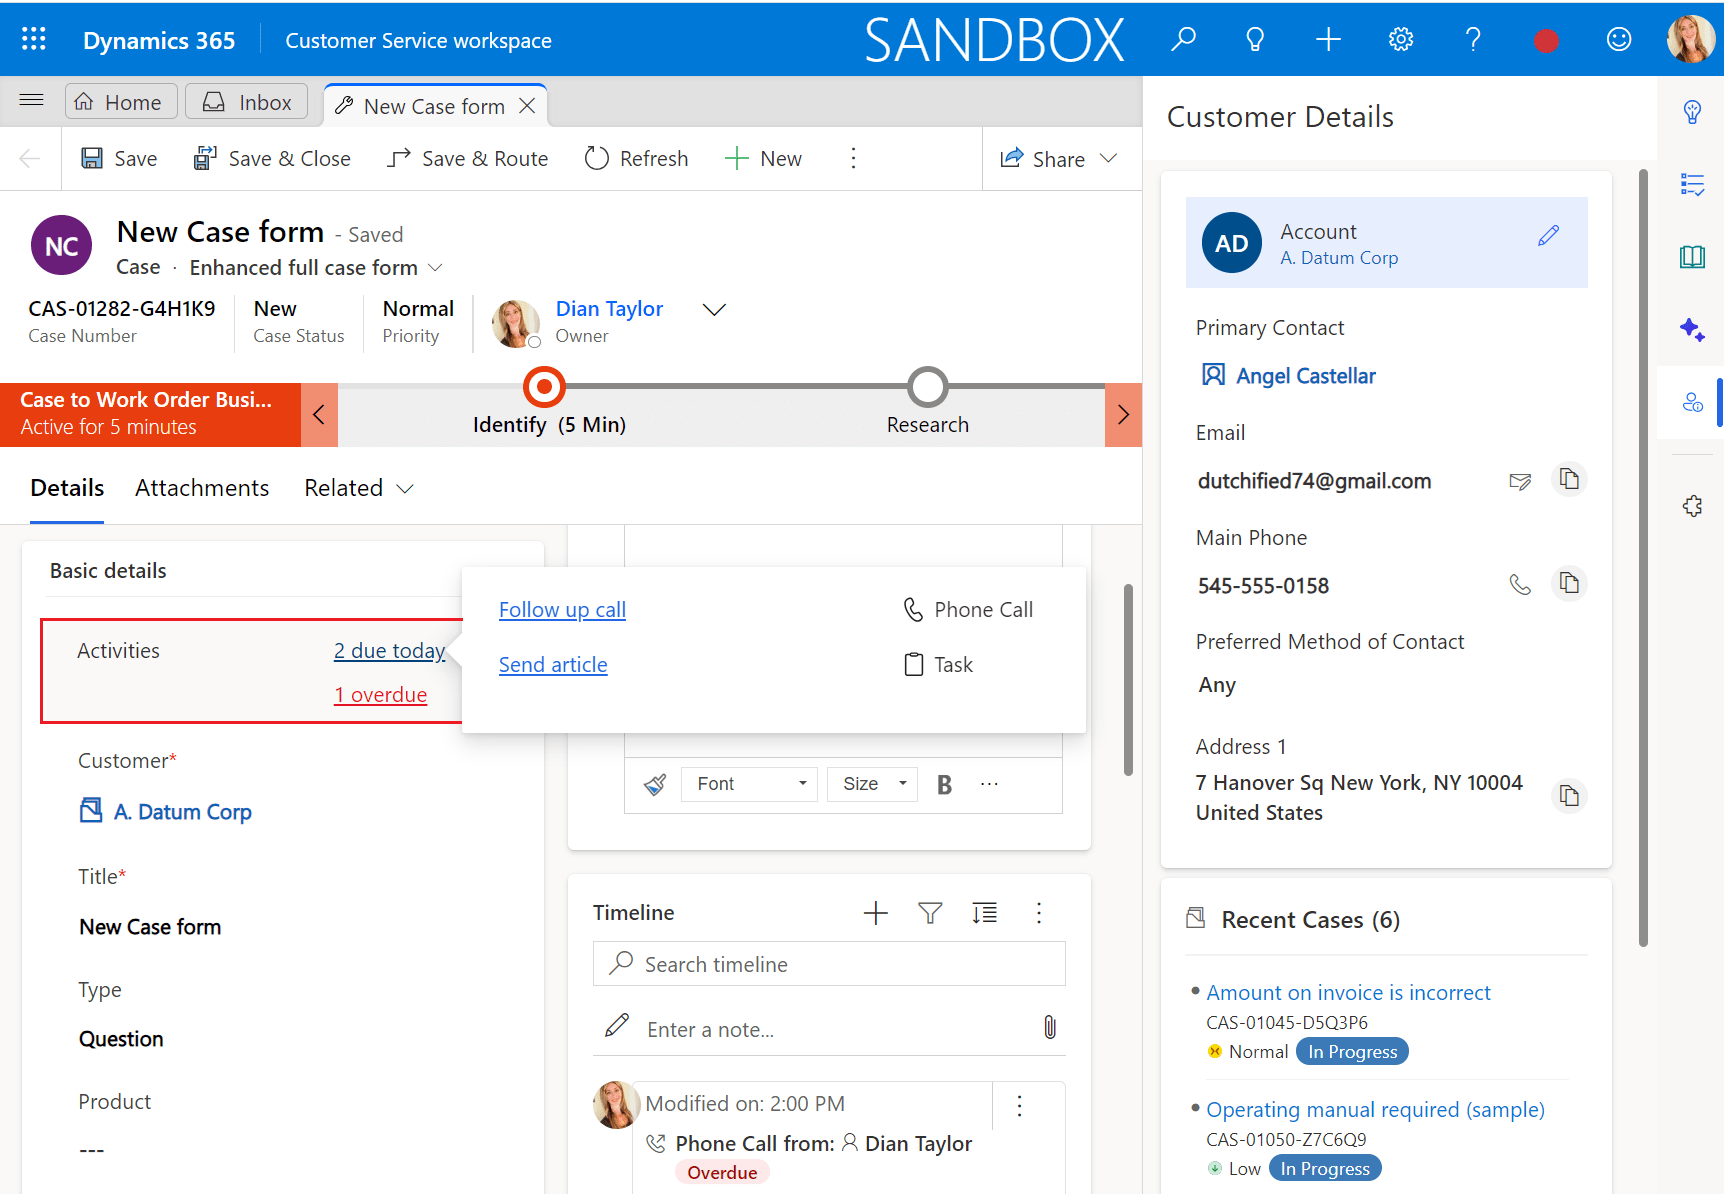
The first control I want to discuss is the ‘activities ‘Due open activities control’. This is a control that sits on an activities subgrid (open activities), where it will show users the number of activities that are overdue, and/or due today. Users can hover over the control to see the activity details.
In order to configure the control on a (custom) form, you’ll need to add the activity grid to your form. Select “Show related records’ and select ‘Activities (Regarding) as the table, and ‘Open Activities’ as the default view. Click ‘Done’. In the properties of the control, scroll down until you see ‘Components’ and expand the section. Click ‘+Component’ and select the ‘Due open activities control’. Select where you want the control to be shown and click ‘Done’. Click ‘Save and Publish’ to publish your changes. Below is an image of what the end result looks like.
Case Associations
The case associations control is cleaning up the legacy ‘Case Relationships’ tab on the out of the box case form. This new control shows a few different things; knowledge articles associated to this case, similar cases, cases that have been merged to this case and lastly and child cases. The way the different views are visible on the case form is very nice, and users can very easily switch views by clicking the corresponding button. I especially love the fact that if a knowledge article is tied to a case, and the user has emailed the article to the customer, the ‘sent to customer’ slider is set to ‘Yes’ automatically!

In order to put this control on a (custom) form you’ll need to add another subgrid to your form. Select the ‘Show related records’ checkbox first, then select the table is called ‘Knowledge Article Incidents’ and you want to select the ‘Associated Knowledge Records View’ as the default view. Click Done and you’ll see the grid appear on the form. Scroll down (right side) and add the ‘Associated Grid Contol’ to the subgrid. A fly out window will appear with several fields that need to be completed. I entered this data below so it’s easier to see what goes where. If a field is not mentioned in the grid below, that means it’s supposed to stay blank. All checkboxes will stay blank. You’ll notice the first section called ‘Subgrid 1’ has already been set and is greyed out.
| Associated Grid Control Field Name | Associated Grid Control Field Value |
|---|---|
| Subgrid 2 | |
| – Table | Connections |
| – View | Related Solutions |
| Subgrid 3 | |
| – Table | Cases |
| – View | All Cases |
| Subgrid 4 | |
| – Table | Cases |
| – View | All Cases |
| Customized title (Subgrid 1) | |
| Static Value | Knowledge Articles |
| Customized title (Subgrid 2) | |
| Static Value | Similar cases |
| Relationship name (Subgrid 2) | |
| Static Value | incident_connections1 |
| Customized title (Subgrid 3) | |
| Static Value | Merged Cases |
| Relationship name (Subgrid 3) | |
| Static Value | incident_master_incident |
| Customizer control (Subgrid 3) | |
| Static Value | MscrmControls.CustomCellControl.CustomCellControl |
| Customized title (Subgrid 4) | |
| Static Value | Child Cases |
| Relationship name (Subgrid 4) | |
| Static Value | incident_parent_incident |
| Customizer control (Subgrid 4) | |
| Static Value | MscrmControls.CustomCellControl.CustomCellControl |
Queue Item Details
Another item on the list of new PCR controls available for Customer Service is the Queue Items control. This allows users to view related queue item details directly on the case without having to open them by clicking on the button on the case. Much easier to review which queue this case is in, and who is working on the item!

This control seems to need a single line of text column to be tied to. If you look at the configuration on the enhanced full case form you’ll see the ‘serial number’ text field is used. The ‘Queue Item Control’ is added the same way as the other controls; scroll down and expand ‘components’ on the property pane on the right side, then select the ‘Queue Item Control’, select where you want to show the component and select ‘Done’.
Attachments
I really like this control, because it allows you to do a few different things! First of all you will be able to add multiple attachments at once. No need to select one file, then upload, then add another one. Major improvement. The next thing blew my mind! We can now upload attachments to a case BEFORE THE RECORD HAS BEEN SAVED! I think that’s a huge deal, because it saves the users from having to click ‘save’ and waiting for the case to be created! Wow! This is pretty big so far! Another cool feature is that this control doesn’t just show the attachments that were uploaded to the case, it can also show attachments from other sources, for example attachments that were emailed to the customer, or attachments associated to a note on the case! Users will be able to see the source the attachment came from and they’ll be able to view the attachments in a tile view! Keep in mind showing attachments from other sources is configurable, so if this is not something you want to use, you can turn it off.

In order to add this new control to a custom or out of the box case form, you’ll need to add a new field to the form. The field is called ‘Pre Create Entity Attachments Id’. NOTE: The schema name is ‘msdyn_precreateattachmentsid’. Once you added the field to the case form you want to enable the attachment control for, select the field on the form and scroll down on the properties sidepane on the right of the screen. Expand the control section and add the ‘Attachment control’. Once the control is added, you’ll notice another fly out window. I have configured the control on my form as followed: Show Control Tile = Yes, Show attachments from conversation = Yes, Show attachments directly uploaded to entity = Yes, Show attachments from email = Yes, Show attachments from notes = Yes. Then select where to show the component on (web, mobile, tablet). Click the done button and save and publish your changes.
Notes
The new notes control is allowing users to enter a note to a case that hasn’t been saved yet, just like I just mentioned for attachments. This will save the user a few clicks and some time, as they won’t have to wait until the case is saved. If you’re configuring this on your form, it’s best to put this on a quick create form, since this only works when a case hasn’t been saved. If you open an existing case, there’s nothing you can do with this control. This is another simple one to configure. You’ll need to add the new text field called ‘PreCreateNotesId’ (schema name ‘msdyn_precreatenotesid’) to your form. Then you’ll have to select the field and add the ‘Notes Control’. Select where to show the component on (web, mobile, tablet). Click the done button and save and publish your changes.

Colored Option Set Values
This is the last of the controls, and one of my favorites! The other thing that is great, is that you can use this control in other areas of Dynamics 365 as well, since it’s a control for choice fields! What this does, is it shows the choices with their associated colors! Making the data look a lot fresher in my opinion! You’ll notice this control is visible on the ‘Priority’ and ‘Case Status’ (status reason) fields in the new enhanced case forms, but you can add this on other choice fields as well to spice them up a bit!

In order to add the control to an choice field, add a choice field to the form or if the field is already on on the form, select it and scroll down in the properties pane on the right side. Expand the ‘control ‘Component’ section and click ‘+Component’ to add the component to the choice field. Select the ‘OptionSet wrapper’ control, select where to show the component on (web, mobile, tablet). Click the done button and save and publish your changes. I hope you enjoyed reading this article! Be sure to check in again next week for a new article or subscribe here to never miss another post!


Comments are Closed