


Power Virtual Agents: Creating basic cards with PowerFX

The last two articles I wrote were both about the new advanced authoring canvas in Power Virtual Agents, which is in preview today. I showed you an example of how we could query data from Dynamics 365 customer service and feed those rows back into Power Virtual Agents so that we can use these values with a question (You can access that article here).
The customer can then pick any of the presented options to answer the question the bot it asking. In my example I used a custom table called ‘Drop Down Values” which represent case categories. In this article I am going to continue to build on this example: I want to ask the customer a few questions so that I can identify them and create a case for them in Dynamics 365 Customer Service. After the case is created I can feed the case details back to Power Virtual Agents and show the details in the chat.
There are a couple of things I will need to add to this topic in Power Virtual Agents first:
- PVA will ask the customer for a short description of the issue they are dealing with. We will use the response to this question as the topic for when we create a new case in Dynamics 365.
- PVA will ask the customer for their email address so that we can query Dynamics 365 and see if there is a record for that customer in the database. If the contact is in the database then the case will be associated with that customer. (Additional logic can be added to create a contact if there isn’t a record found in Dynamics 365.)
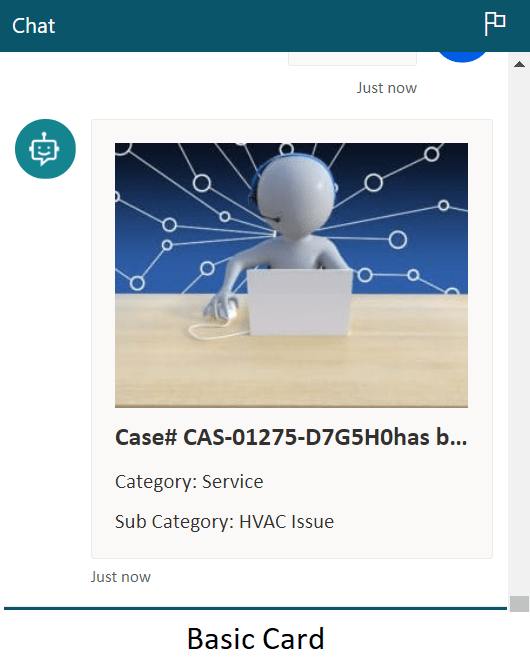
I am not planning to explain how I built the Power Automate flow that does the things I just mentioned above. (I wrote an article on a similar topic previously, which you can read here.) What I am going to cover here is how we can create a basic cards in Power Virtual Agents. The data shown in these cards can be configured using PowerFX, which is the low-code language that is used across Microsoft Power Platform. PowerFX is a general-purpose, strong-typed, declarative, and functional programming language. I know those of you who are not a developer will probably have the same thoughts that I had: I am not a programmer or developer so I can’t write PowerFX formula’s! That’s actually not the case! These PowerFX formula’s in basic cards and adaptive cards are really not as hard as you think! Below is the image that shows what the basic card will look like in Power Virtual Agent.
Scenario
In my scenario we have a topic in Power Virtual Agent that will identify the customer by email, and then creates a case in Dynamics 365 Customer Service for that customer. Once the case is created in Dynamics 365 Customer Service, I want to send some of the case details through the Power Virtual Agent chat back to the customer. The details I will show in the card are:
- Case Number
- Case Category
- Case Subcategory
I’ll show you how to create the basic card in Power Virtual Agents using PowerFX and what it looks like.
Creating the Basic Card
The basic card will be shown from a message node. Click on the ‘+’ button and select ‘Send a message’ to add a message node. When the message node is created, click on the ‘+ Add’ button on the top left and select ‘Basic Card’. You’ll notice the card properties will open up on the right side of the screen as shown on the image below.
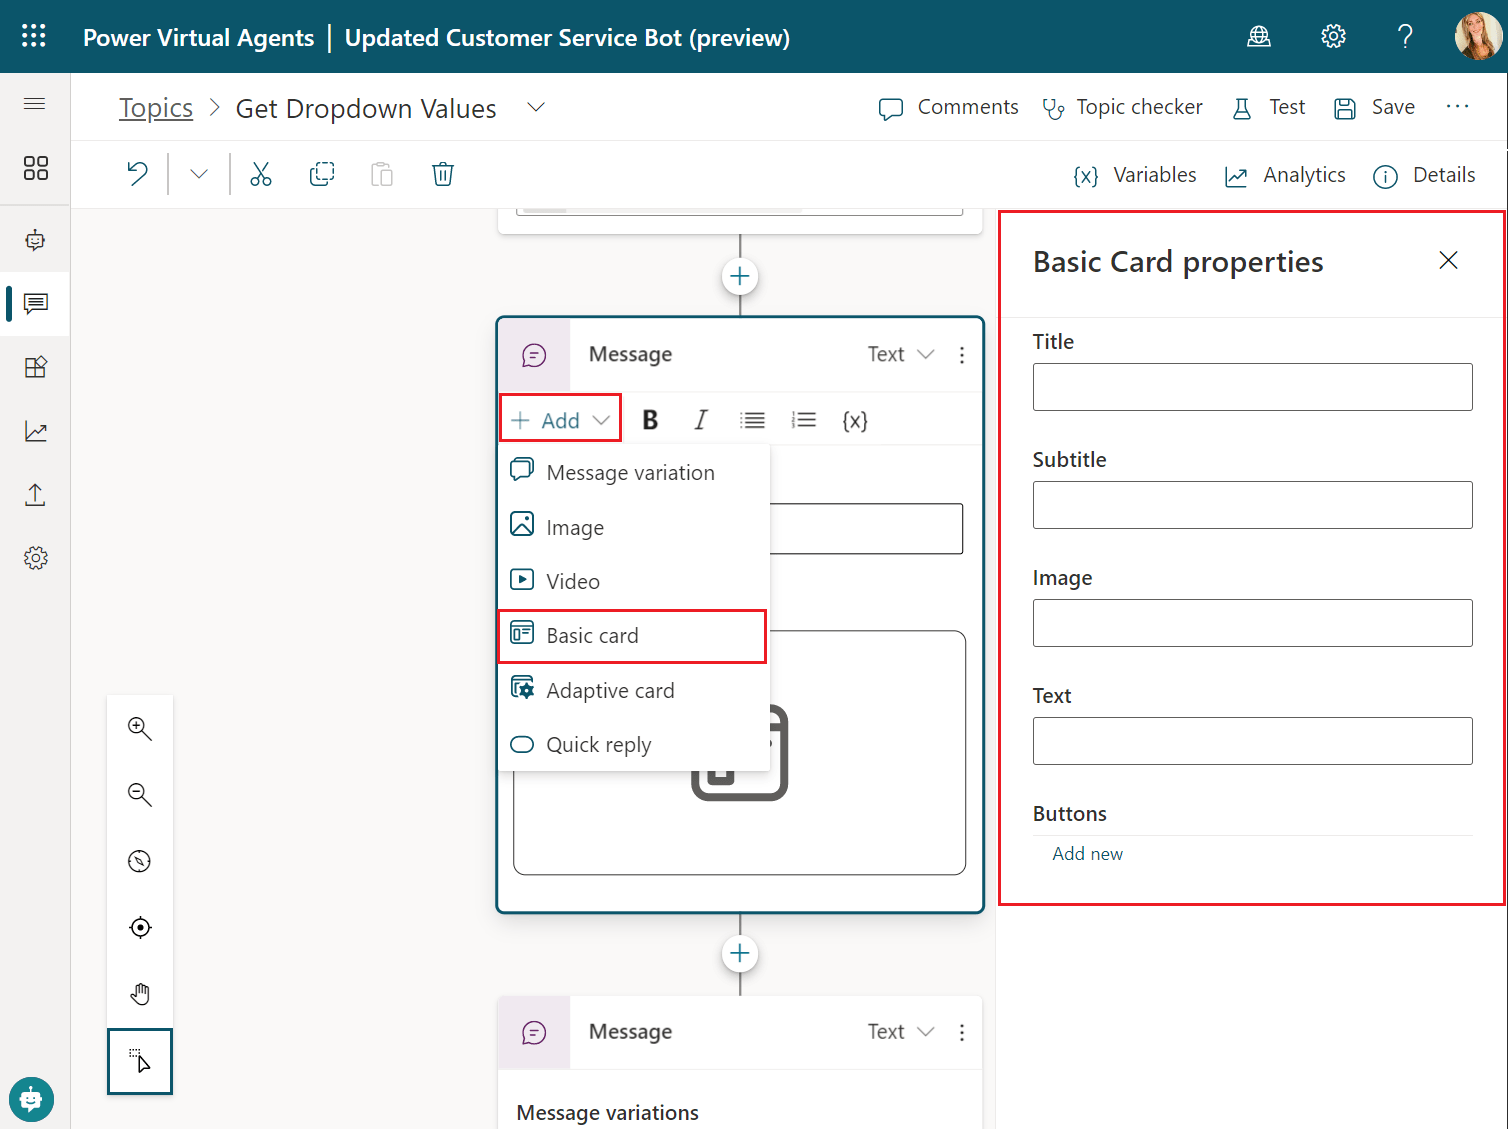
You’ll notice 4 fields in the basic card properties screen, these are the fields that can be shown in the cards. The data in the title field will be larger than the rest and shown in bold. The subtitle data will be a smaller font (not bolded) and the text button will have the smallest font. In the image field you can enter a (static) URL to a public image (I used this URL in my card) or we can use PowerFX. Please note entering data in any of the fields is optional. Just like in the URL field , we can enter static data in any of these fields, but this kind of defeats the purpose of showing relevant and dynamic data in the card.
You’ll notice when you click into any of these fields, an FX icon shows up on the top right corner of the field. By clicking on this icon you can open the PowerFX formula bar for that specific field. If you read my previous article I showed you that I have a question node in PVA: “What is your case regarding“, where the variable name (this is where the response is stored) is ‘CaseCategory‘. It’s important to note that we will need to use these variables in the PowerFX formula to get the data into the card. I will use a few other variables with data that I want to show in the card:
- CaseSubCategory: stores the sub category the customer entered in the chat
- CaseNumber: Stores the case number of the newly created case (Power Automate)
Below is an image of the question and power automate variables I’ll be using in the cards.

Click into the ‘Title’ field of the basic card and click on the FX button to access the PowerFX formula bar. The first thing I want to show in the card is ‘Case#’ so I will type out exactly that. The next part of data will be the data stored in the ‘CaseNumber’ variable in Power Virtual Agents. You can do this by first entering ‘&’ and then adding (Topic.variablename). In my example this means (Topic.CaseNumber). Please note that if the variable has caps, you’ll need to also type them here. After the case number I want to add “had been created” so I enter exactly that. The formula looks like this:
"Case# " & (Topic.CaseNumber) & "has been created"For the subtitle I want to show the case category that was selected during the chat. The formula for this is:
"Category: " & (Topic.CaseCategory) If you have multiple variables you want to use here (let’s say you want to show both the category and the subcategory) the PowerFX formula will look like this:
"Category: " & (Topic.CaseCategory) & "Sub Category: " & (Topic.CaseSubCategory) For the text field I want to show the case subcategory that was selected during the chat. The formula for this is:
"Category: " & (Topic.CaseSubCategory) See how easy that was?! You just created your first basic card using variable data in a PowerFX formula! I hope you enjoyed this post! Be sure to check in again next week for a new article where I will be showing you how to create an adaptive card using the same data or subscribe here to never miss another post!


Comments are Closed