


Simplified Dataverse search configuration

I am not sure if you heard yet that Relevance Search has been renamed to Dataverse Search? I actually realized it the other day when I tried to turn off Relevance Search for one of my Dynamics 365 environments, when I couldn’t locate the option to turn off Relevance Search. This option had been replaced by the option to turn off Dataverse Search instead and this is when it hit me. For the folks who at this point have no idea what I am referring to, Dataverse Search is the global search that comes with the application. Besides the name change there are some additional changes (improvements might be a better word) to Dataverse search. Previously app makers had to set this up in the legacy configuration tool by opening the default solution, but per October of this year we now have an easier way to do these configurations. Microsoft is trying to move as many of these configurations over to the updated maker experiences, which I believe is a great thing. Hopefully in the near future we won’t want to have to navigate to one area of the application in order to make one change, and then navigate somewhere else to make another, which unfortunately seems to be the case today.

In order to configure Dataverse search I would recommend turning it on first. You can do this by navigating to the environment you want to turn this on in; go to https://admin.powerplatform.microsoft.com/ and select the environment. When the environment page opens, click on the settings icon on the command bar on the top of the page. Expand the ‘Product’ area and click to open ‘Features’. You’ll notice the ‘Dataverse Search’ button under the Search section on the top right of the screen. Unfortunately this is not the same place where we can configure Dataverse search, we will have to navigate to the maker experience in order to do that. It’s important to understand that certain tables are included with Dataverse search, but you have the ability to remove any of them if needed. You also have the ability to add custom tables to Dataverse search. The tables that are enabled by default for Dataverse search in an environment without Dynamics 365 apps installed are:
- Accounts
- Contacts
- Knowledge Articles
- Goals
- Goal Metrics
Tables that are enabled by default for Dataverse search in an environment with Dynamics 365 apps installed are:
- Lead
- Opportunity
- Opportunity Product
- Product
- Quote
- Order
- Invoice
- Contract
- Case
- Service
- Service Activity
- Competitor
- Marketing List
- Campaign
- Campaign Activity
- Campaign Response
Go to https://make.powerapps.com and make sure you have the correct environment selected. The environment can be found on the top right of the page. You can change the environment by clicking on the environment name and selecting a different one. Click on ‘Solutions’ on the sitemap (left side of the screen) and open a solution. I am going to open the default solution. You can find the solution by entering the name in the search bar on the top right of the screen. Once the solution page opens up, click on ‘Overview’ on the sitemap (left side of the screen). On the right side of the page you’ll notice a section for Dataverse Search showing you details of the Dataverse search setup. You’ll notice the % of columns and the total number of columns indexed for search in the solution you just opened and in the whole environment. NOTE: There is no limit in the number of tables that can be indexed for Dataverse search, but there IS a limit on the total number of columns, which is 1000. Another thing to note is that out of those 1000 columns, 50 of those columns are mandatory fields (I.E Ownerid, owningbusinessunit, statecode, statuscode, name, etc.) which leaves us with a total of 950 columns that we can configure as searchable columns. This is the total number of fields available for the entire environment.

When you click on ‘Manage search index’ on the right side of the Dataverse search section on the screen, you’ll notice this will open a side pane with a list of table names that reside in the application. This view will show you a list of all the tables that we can make searchable for our users. All you have to do to add a table to Dataverse search is check the box next to it. When you switch to the ‘indexed’ tab, you’ll be able to see all the tables that have been added to Dataverse search. You’ll also notice the numbers of columns for each table that have been added to the search index. Unfortunately you don’t have the ability to make updates to the columns from here. If you want to add or remove columns from the index you can do that by removing or adding ‘find‘ fields from a quick find view of a table. The find columns in the quick find view represent all the columns of a table that will be searched.
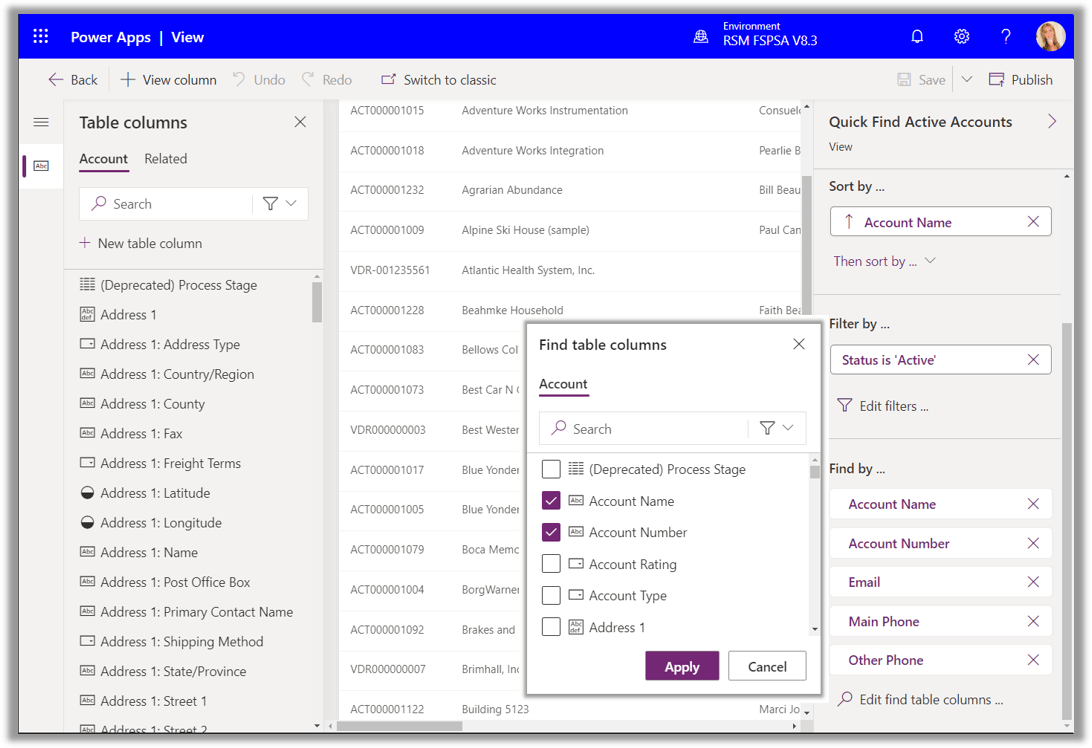
In order to make a change to the find fields of a quick find view, you’ll need to navigate to https://make.powerapps.com. Make sure you have the correct environment selected. Select ‘Data’ on the sitemap and then select ‘Tables’. Search for the table you want to make the change to and open it. Once the table opens, click on views and search for the quick find view for that table. When you open the view you’ll notice the ‘Find by’ columns on the right lower side of the screen. This is where you can add and remove any searchable columns. NOTE: There is no limitation to the number of columns that can be added to Dataverse search per table, however as I mentioned earlier, there is a limit on the total number of columns that can be indexed as a whole (1000).
Keep in mind that even though most types of fields take up just one column in the search index in Dataverse search, some type of fields might take up more than one column. For example an option set/choice type of field will take up 2 columns in the search index, while a lookup field will take up 3. Once you have selected all the tables you want to include in Dataverse search make sure you save your selection. Please keep in mind that any changes make to the Dataverse configuration can take up to 15 minutes to publish. The actual timing can be longer and will depend on the amount of data in the environment.
I hope you enjoyed this article! Be sure to check in again next week for a new article or subscribe here to never miss another post!


Comments are Closed