


Extend Copilot for Microsoft 365 with Dynamics 365 Data (preview)

I am sure you have heard the term “Copilot” a lot in the Microsoft universe. It can be overwhelming to understand the different types of Copilots available. There is a Copilot for Dynamics 365 Customer Service, which helps customer service agents by searching through knowledge sources like SharePoint sites, internal websites, and knowledge bases to help solve customer issues. On the other hand, Copilot for Sales exists in Dynamics 365 Sales. It is used to assist sellers with various sales-related activities, such as creating proposals, responding to emails, and asking about sales data. (If you are interested about learning more about Copilot for Sales’ new features coming out in 2024 Release Wave 1, then check out this article.) Then there is Copilot for Power Automate, Copilot in PowerApps, Copilot for Powerbi, and the list goes on and on. In this article I want to talk about Copilot in Microsoft 365, which is Microsoft’s version of a digital assistant. What does that mean? Microsoft Copilot is a chat bot that integrates your work content and context into its chat capabilities. Users can ask Copilot questions in natural language about work-related things, for example summaries about chats, emails or files, or asking for help with writing a proposals or an email, or even getting help with generating ideas. The thing I want to talk about in this article, is the ability to enhance Copilot Microsoft 365 with data from other applications, so that users will be able to ask questions about other things than just the data that lives in Microsoft 365. How about being able to give people access to Dynamics 365 CX? This will be very beneficial for sales people that want to know about their leads and opportunities,! Think about Field Service front line workers, who might want to ask Copilot questions about work orders and bookings! We can add these data sources to Copilot for Microsoft 365 by creating plugins, and the great thing about this, is that the scenario’s I mentioned above, is something that is already configured! As soon as you enable plugins for Copilot for Microsoft 365, these out of the box plugins for Dynamics 365 Sales and Dynamics 365 Field Service will show up, ready for use!
Opt-in to plugins for Copilot for Microsoft 365 & Deploy App
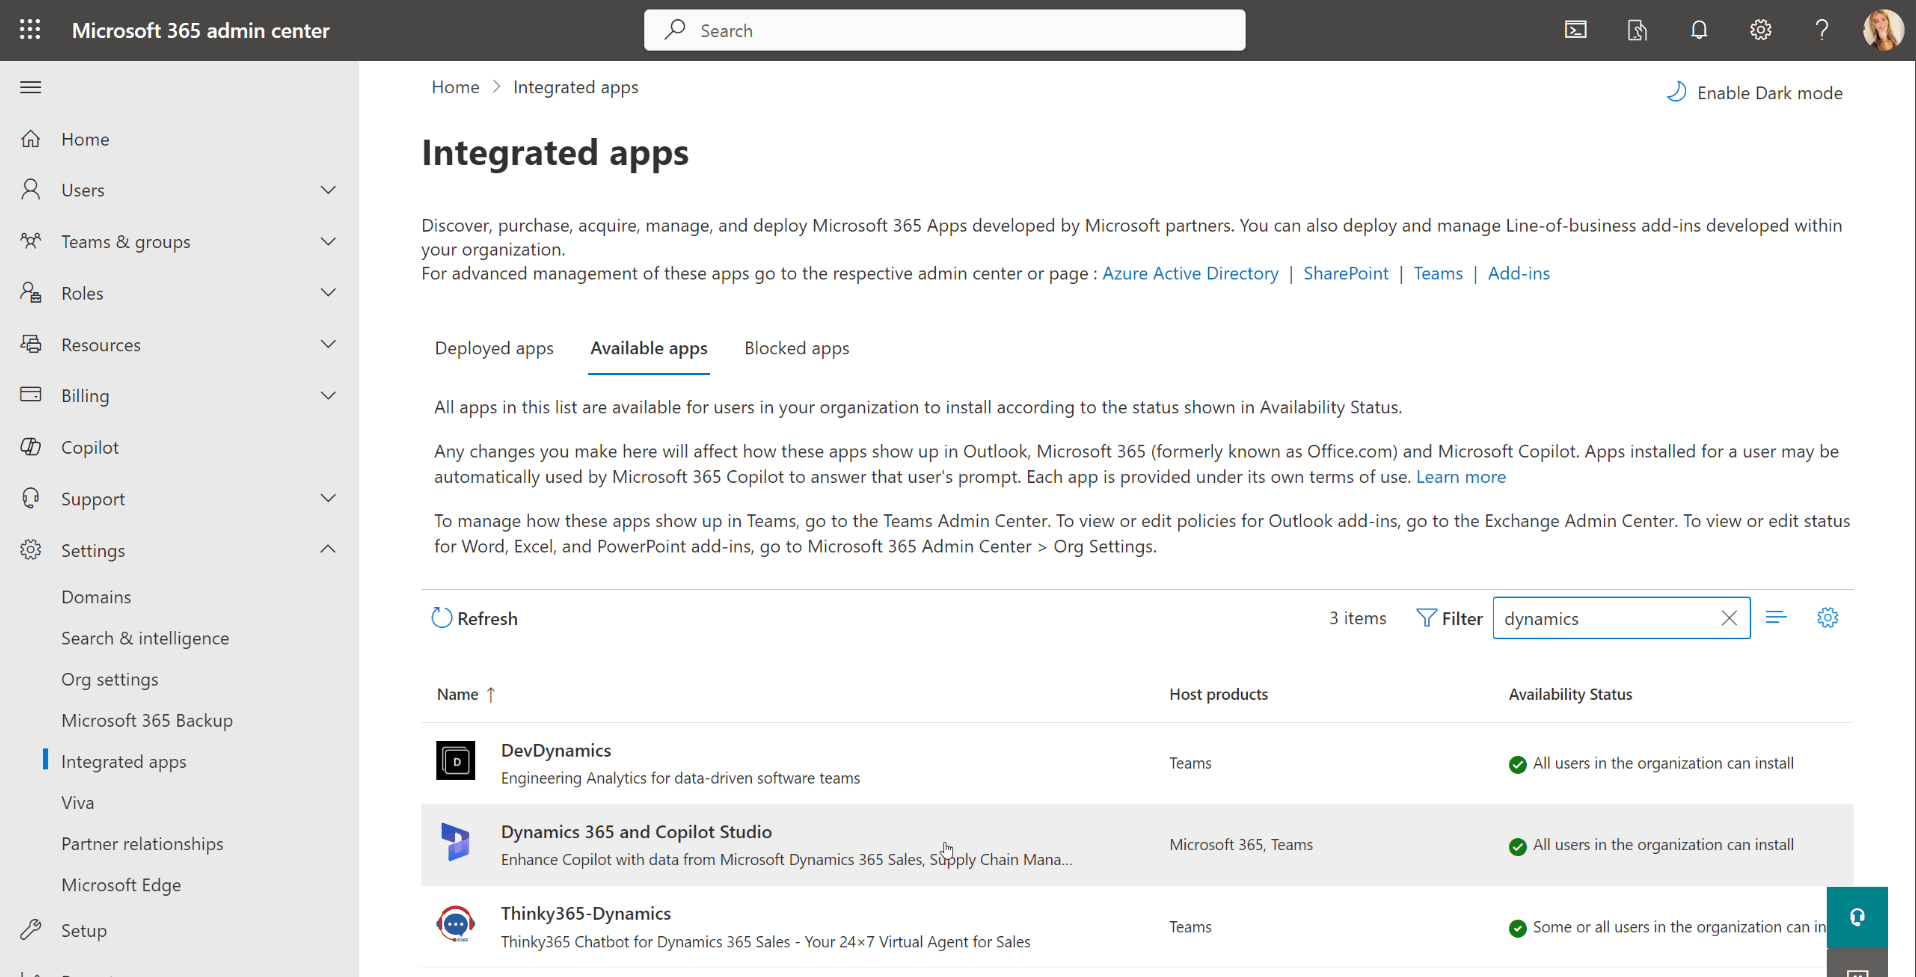
Since this feature is in public preview today, first I had to submit a ticket in the Microsoft 365 admin center, to opt-in to this feature. It took a few days until I received a message stating ‘plugins for Copilot for Microsoft 365 have been enabled in your environment.’ The next step is to deploy the Dynamics 365 and Copilot Studio App in your environment, as mentioned here. There was a small problem when I tried to do that, as I was unable the find the app when I searched for it. Unfortunately, this meant that I had to log another ticket. It took a few days for the support team to fix the issue, but after they did, I was able to very easily deploy the app. You can do this by navigating to the Microsoft 365 Admin center, and expanding settings on the sitemap. Below the settings area you will see ‘Integrated Apps’, click on it to load the page, then click on ‘available apps’ and search for the Dynamics 365 and Copilot Studio App.
Deploying the app is very simple and easy to do. Click on the Dynamics 365 and Copilot Studio app. This will open a side pane on the right side of the screen. The screen that opens has some information about the app, but the only thing you’ll need to do here is click on ‘Deploy’ app, which will start the deployment. The next screen that loads shows some information about the app, but you don’t have to do anything here, except click the ‘next’ button on the bottom. The next screen that loads allows you to select for which users the app should be deployed, you can choose from ‘just me’, ‘entire organization’ or ‘specific users/groups’. Since I want everyone to be able to play with this, I selected ‘entire organization. This page also allows you to make this a test deployment, which I didn’t do when I deployed the app. After selecting the users and clicking ‘next’ again, you are taken to the permissions page. Again, nothing you need to do here, except clicking on the ‘next’ button on the bottom of the screen. The final page has the ‘finish deployment’ button, which after you click it, initiates the deployment process. It only took about 4 seconds for the deployment to complete! You’ll see the app now in the list of deployed apps.
Access the Copilot for Microsoft 365 App in Teams
After the app is deployed, you can now access it in Microsoft Teams. According to the documentation here, users will need to enable the connection in the Copilot app in Teams first. (This is a one time thing.) They can do this by opening Teams and clicking on the three dots on the sitemap, and searching for the Copilot app. Clicking on the Copilot app will open it in Teams, and the user can start interacting with it. The user needs to go to the Power Platform Copilot plugins configuration portal, where they can enable the plugins they want. You can do this by asking Copilot ‘how can I use a plug-in?’ after which Copilot will answer and give the user a link to the Power Platform Copilot plugins configuration portal. All I did was click on the link, and then closed the configuration portal, so I am not sure what else I was supposed to do there.

Back in the Copilot app in Teams, you’ll notice the plugin button on the left side of where you enter your messages. It will show you a list of plugins that are available in the environment. You’ll see the Dynamics 365 Sales plugin under the Dynamics 365 category and the Field Service plugin(s) below the Copilot Studio category. NOTE: If you have multiple environments and Dynamics 365 Field Service is configured for any of them, you’ll see all of these plugins listed below the Copilot Studio category. The problem I encountered is that all of the plugins are called ‘Field Service’ so there is no way to know which plugin is pointed to your production environment. Microsoft is working to add the environment name to the plugins to help identify the correct one.

To enable a plugin, all you have to do set the switch on the plugin to ‘On’. You can now start to ask questions about the Dynamics 365 Field Service data or Dynamics 365 Sales data! There are a ton of things that you can ask, but you’ll have to try and see which prompts give you the best responses. Some of the prompts I tried successfully while using the Dynamics 365 Sales plugin are:
- Show me my open opportunities
- Show my open opportunities formatted as a table
- Add the estimated revenue column to the table
- Can you provide me more details about the opportunity ‘opportunity name‘
- Who is the owner of the opportunity?
- Show me a list of my open leads
I hope you enjoyed this article! Be sure to check in again next week for a new article or subscribe here to never miss another post!


Comments are Closed