


Power Virtual Agents: Question Options Deep Dive

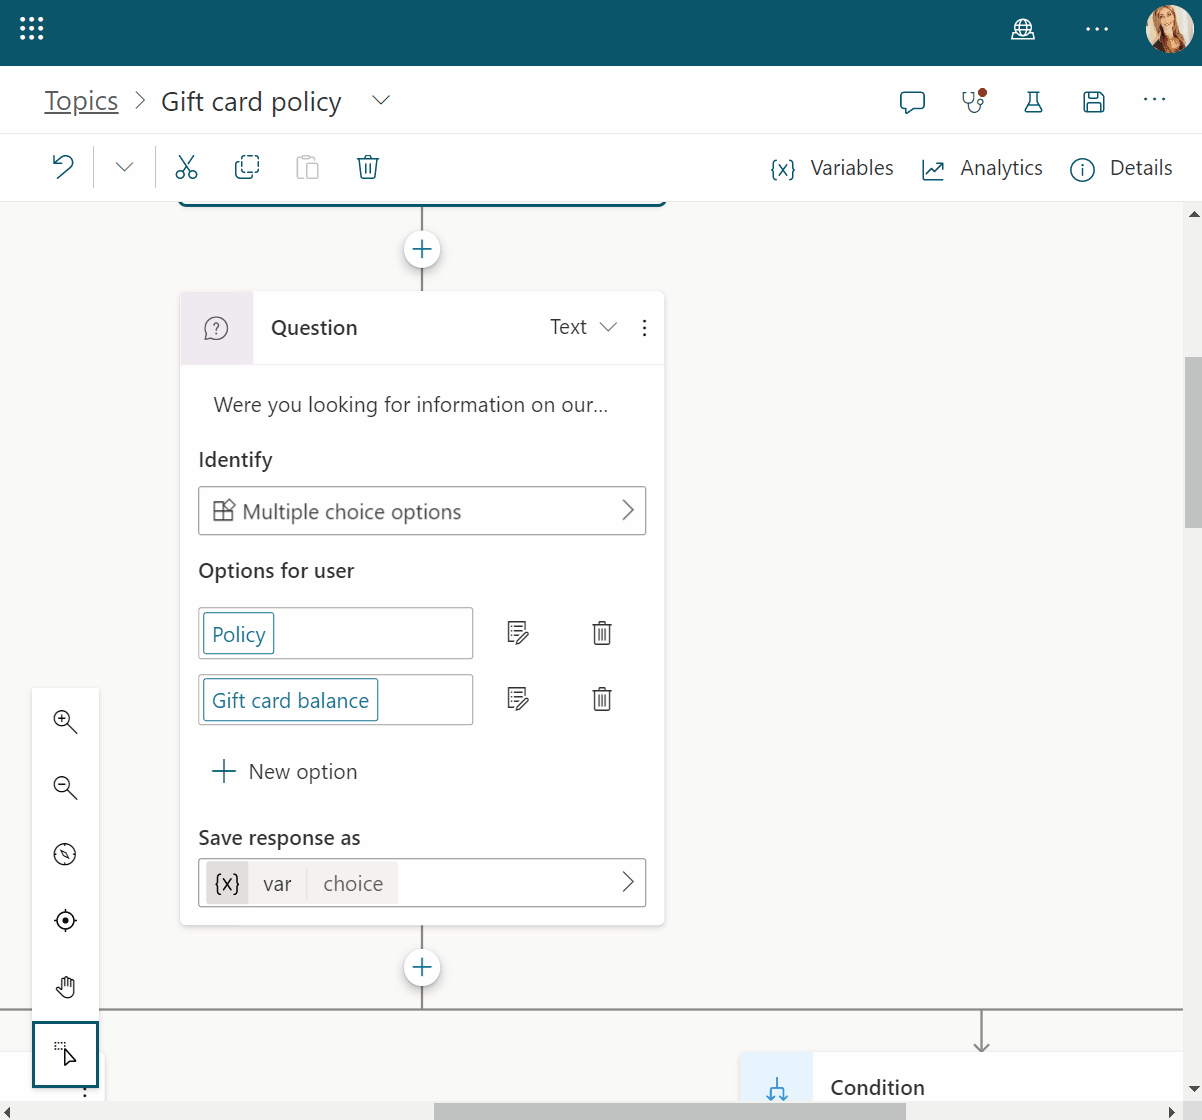
Since the public preview of the updated version of Power Virtual Agents became available last month, I have been hitting PVA hard. Meaning any time I had availability I was working in Power Virtual Agents trying to uncover as many secrets as I could! If you a frequent visitor of my website, you might have noticed that the last 3 articles were all about the new experience in PVA and I have been sharing all of my findings with you all. This week I went deep into the available question functionality in Power Virtual Agents, and it’s a lot! Just to give you some context of what the available option(s) are today, well, there is really only one! This is the ability configure whether or not to skip a question if a response was already provided prior to asking the question. No other options there. When we look at the question options in the public preview of the updated Power Virtual Agents , you’ll learn that there are A LOT more options that have been added in this updated release! In order to access these options you need to click on the three dots on the top right of a question. (Yes you’ll need to create a question first if you haven’t yet.) When the dots are clicked, you’ll see three options;
- Properties: Access properties for this question
- Delete: Will delete the question
- New comment: Allows makers to enter a comment related to the question
Obviously you’ll want to click the properties option. This will open the question properties window from where you need to click on the box that reads: ‘Question behavior Control how your bot asks this question and identified the entity’. Once you do click that box, you’ll see all the available options, as shown below.
Skip behavior
On the top of the screen we see the ‘Skip Behavior’ functionality, which (as I mentioned earlier) we have in Power Virtual Agents today. The thing to note here is that we do get some additional functionality here. In the ‘Skip Question’ section you have the ability to select ‘Allow question to be skipped‘ and ‘Ask every time‘, but the difference here is that we can configure a PowerFX formula instead, which gives makers a lot more flexibility! The way this works is if the statement in the PowerFX formula is true, the question will be skipped. So for example if you wanted to check data in a variable related to an earlier asked question, you could! Let’s say you asked a yes/no question earlier and want to skip the question if the answer to that question was no, well, this is possible now! Of course this is a very simple example, but I hope this explains how this could work in this context.
Reprompt
I think the reprompt feature is one that was missing from the application. Let me explain what this does. You might have a question configured to receive specific type of value. For example, maybe you have a question asking for a certain number of people, this is where PVA will expect a numerical value to be entered as a response, or maybe you have a question asking for an appointment date, this is where the bot will expect a date value. Reprompting happens when power virtual agents receives an invalid response to a question. (I.E so when the bot is expecting a date to be entered, and it gets a different data type instead.) We can configure the reprompt behavior, meaning we can configure how the bot will react when this happens. Maybe you want the bot do ask the question again, or maybe you just want the bot to ignore the answer and move on? This is configurable below the ‘How many reprompts‘ area. You’ll notice there are currently 3 options available when the setting on the right is set to ‘value’.
- Don’t repeat: This speaks for itself, PVA will move on without asking the question again
- Repeat once: PVA will ask the question again (1x at most)
- Repeat up to 2 times: PVA will ask the question again (2x at most)
If you change the setting on the right from ‘Value‘ to ‘Formula‘ (yes this is another place to use PowerFX formulas), you can enter another PowerFX formula, or you can change the number of repeats by just entering a number in the formula bar.
It’s important to understand that if you selected any of the repeat options, the default behavior is to have the bot ask the exact same question again. However, we can also configure a different message to use as a reprompt message. When you check the box next to ‘Retry prompt‘ you’ll notice additional options show up where we can configure one or more messages. You can add messages by clicking ‘+Add’ and selecting ‘Message variation’ from the choices. If there are more than one message variation here the system will randomly pick one which is why I would recommend creating several. What I also want to point out is that you can format the message text and even add variables. So for example if you have the customer’s name, you could say something like ‘Sorry <customer name> I didn’t get that, can you please try again by entering a number?‘. Pretty cool right?!

Additional entity validation
If you have worked with Power Virtual Agents before you know that we can assign an entity to a question, which will tell the bot what type of answer we’re looking for. For example, a question could be assigned the email entity, which means that the bot will be looking for an email address in the answer. Or if the question is ‘How many people will be attending dinner’ we want to make sure the number entity is assigned because we are looking for the total number of people. Today this is all the validation we can configure for a question, but what if you needed additional validation? What if the number of people that will be attending dinner can’t me over 15? This is where the additional entity validation comes in. The actual validation condition needs to be written in a PowerFX formula and entered in the ‘Condition’ field. The formula that you enter here must evaluate to either a true or false statement. Keep in mind that the default behavior here is that when the PowerFX condition IS NOT MET, the ‘Condition not met‘ message will be shown. These messages can be added the same way we added the ‘Retry prompt’ messages. If I take the example from earlier, where we want to make sure there are no more than 15 people who will be attending dinner, the formula will look like this:
Topic.questionvariablename < 16 which in my case (image above) is Topic.PartySize < 16
NOTE: At the time that I was testing the ‘Additional entity validation’ functionality, (the ‘Condition not met prompt’ in particular) I noticed that my customized message wasn’t shown when I entered a number higher than 16. I talked to Microsoft about this and they informed me they are aware of this bug. Custom validation rules currently only work with string data types but this will be fixed before GA.
No valid entity found
What this means is that your bot asked a question, but it didn’t get the response it expected, reprompt may have happened, but it still didn’t get the correct response. If we use the same scenario’s from earlier, then what happened here is the bot didn’t get a number value response when it asked ‘How many people will be attending dinner‘. When the bot reprompted the user to ‘please enter a number value’ and the user still didn’t give the proper response that means that no valid entity was found. We can configure what the bot does when this happens. There are several actions available:
- Escalate: Will direct the conversation to the escalate topic
- Set variable to value: You can set the value that needs to be saved in this variable
- Set variable to empty: The variable related to this question will be left blank
You’ll notice below the ‘Action is no entity is found’ field is the ability to configure custom messages. If you don’t configure messages here, the bot will show a default message in the chat. These messages can be added and configured the same way as the ‘Condition not met prompt’ and ‘Retry prompt’ messages.
Interruptions
The last option available for question nodes is a simple yes/no configuration. This is where you can set if it’s allowed for a customer interacting with the bot, to switch to a different topic during this question. This can be an important setting as the information provided in this question could be crucial. I hope you found this article informative! Be sure to check in again next week for a new article or subscribe here to never miss another post!


Comments are Closed