


Customize Work List Cards in 2022 Wave 2!

The feature that I am going to discuss in this article is part of the early release features of the upcoming release wave! When I wrote my article on the release notes for 2022 Release Wave 2, I didn’t have access to any of the early release features, which is why I am writing this article now that I do have access. I installed the early release features for Dynamics 365 on my sandbox and started playing around with them to see exactly what they are and how they work. In the past I’ve done articles discussing all the new features per app (Dynamics 365 Sales, Dynamics 365 Customer Service, Dynamics 365 Field Service, etc. but I decided to switch it up a little bit. Anyways, let’s get started!
If you look at the early access features page hosted by Microsoft, you’ll notice there are two early access items showing for Dynamics 365 Sales. The item I am going to discuss is in this article is the ‘Customizable worklist cards for right contextual information to the seller’. This feature is related to the Sales Accelerator in Dynamics 365 Sales. What this means it that we can now configure/customize the work item cards that show up in the Slaes Accelerator. If you haven’t used the Sales Accelerator yet, you’re probably wondering what this work item card is and where it can be found? The work item card is the card that shows up in the work list when you navigate to ‘Sales Accelerator’ on the sitemap. (Keep in mind you will need to enable the sales accelerator before you’ll see it on the sitemap.)

You can see the work items cards and what they look like in the screen shot above. You might expect the configuration/customization to take place in the same place where all the other form and card configurations take place (which is in the power platform admin center) but this is not the case. I think this is because this way we can give certain (super) users or Managers the ability to just configure these cards, not any other forms in Dynamics 365 Sales. Keep in mind these work item cards are not data entry forms, they are just for viewing data, so this approach makes sense to me.
In order to access the configuration window where you can change the work item’s appearance you need to change the area in the Sales Hub to ‘Sales Insights Settings’, then you need to access the ‘Workspace’ which you’ll see below the Sales Accelerator section. From there you’ll see ‘Work item appearance’ below the ‘Customize Workspace’ section on the page. When you click on ‘Work item appearance’, the Sales Accelerator settings window will open. You can also access this window by accessing the Sales Accelerator on the sitemap from the Sales area, and clicking the three dots on the top of the work list. (On the far right side of the search bar) When clicking the three dots you’ll notice 3 options in a fly out menu: Bulk email, Refresh and Settings. Clicking ‘Settings’ will open the settings window.
When you click on ‘Work item appearance’ inside the settings window, you’ll notice on the bottom there is a button that reads ‘Switch to admin mode’. If this button is set to ‘Yes’ you can start making changes to the work item cards. On the top of the screen you’ll see a drop down field allowing you to pick the table you want to configure/customize the work item card for, and below the drop down field you’ll notice a preview section. This will show you what the card will look like in the Sales Accelerator. All the configuration takes place on the right side of the screen. You’ll notice the word ‘Customize’ above the configuration screen.
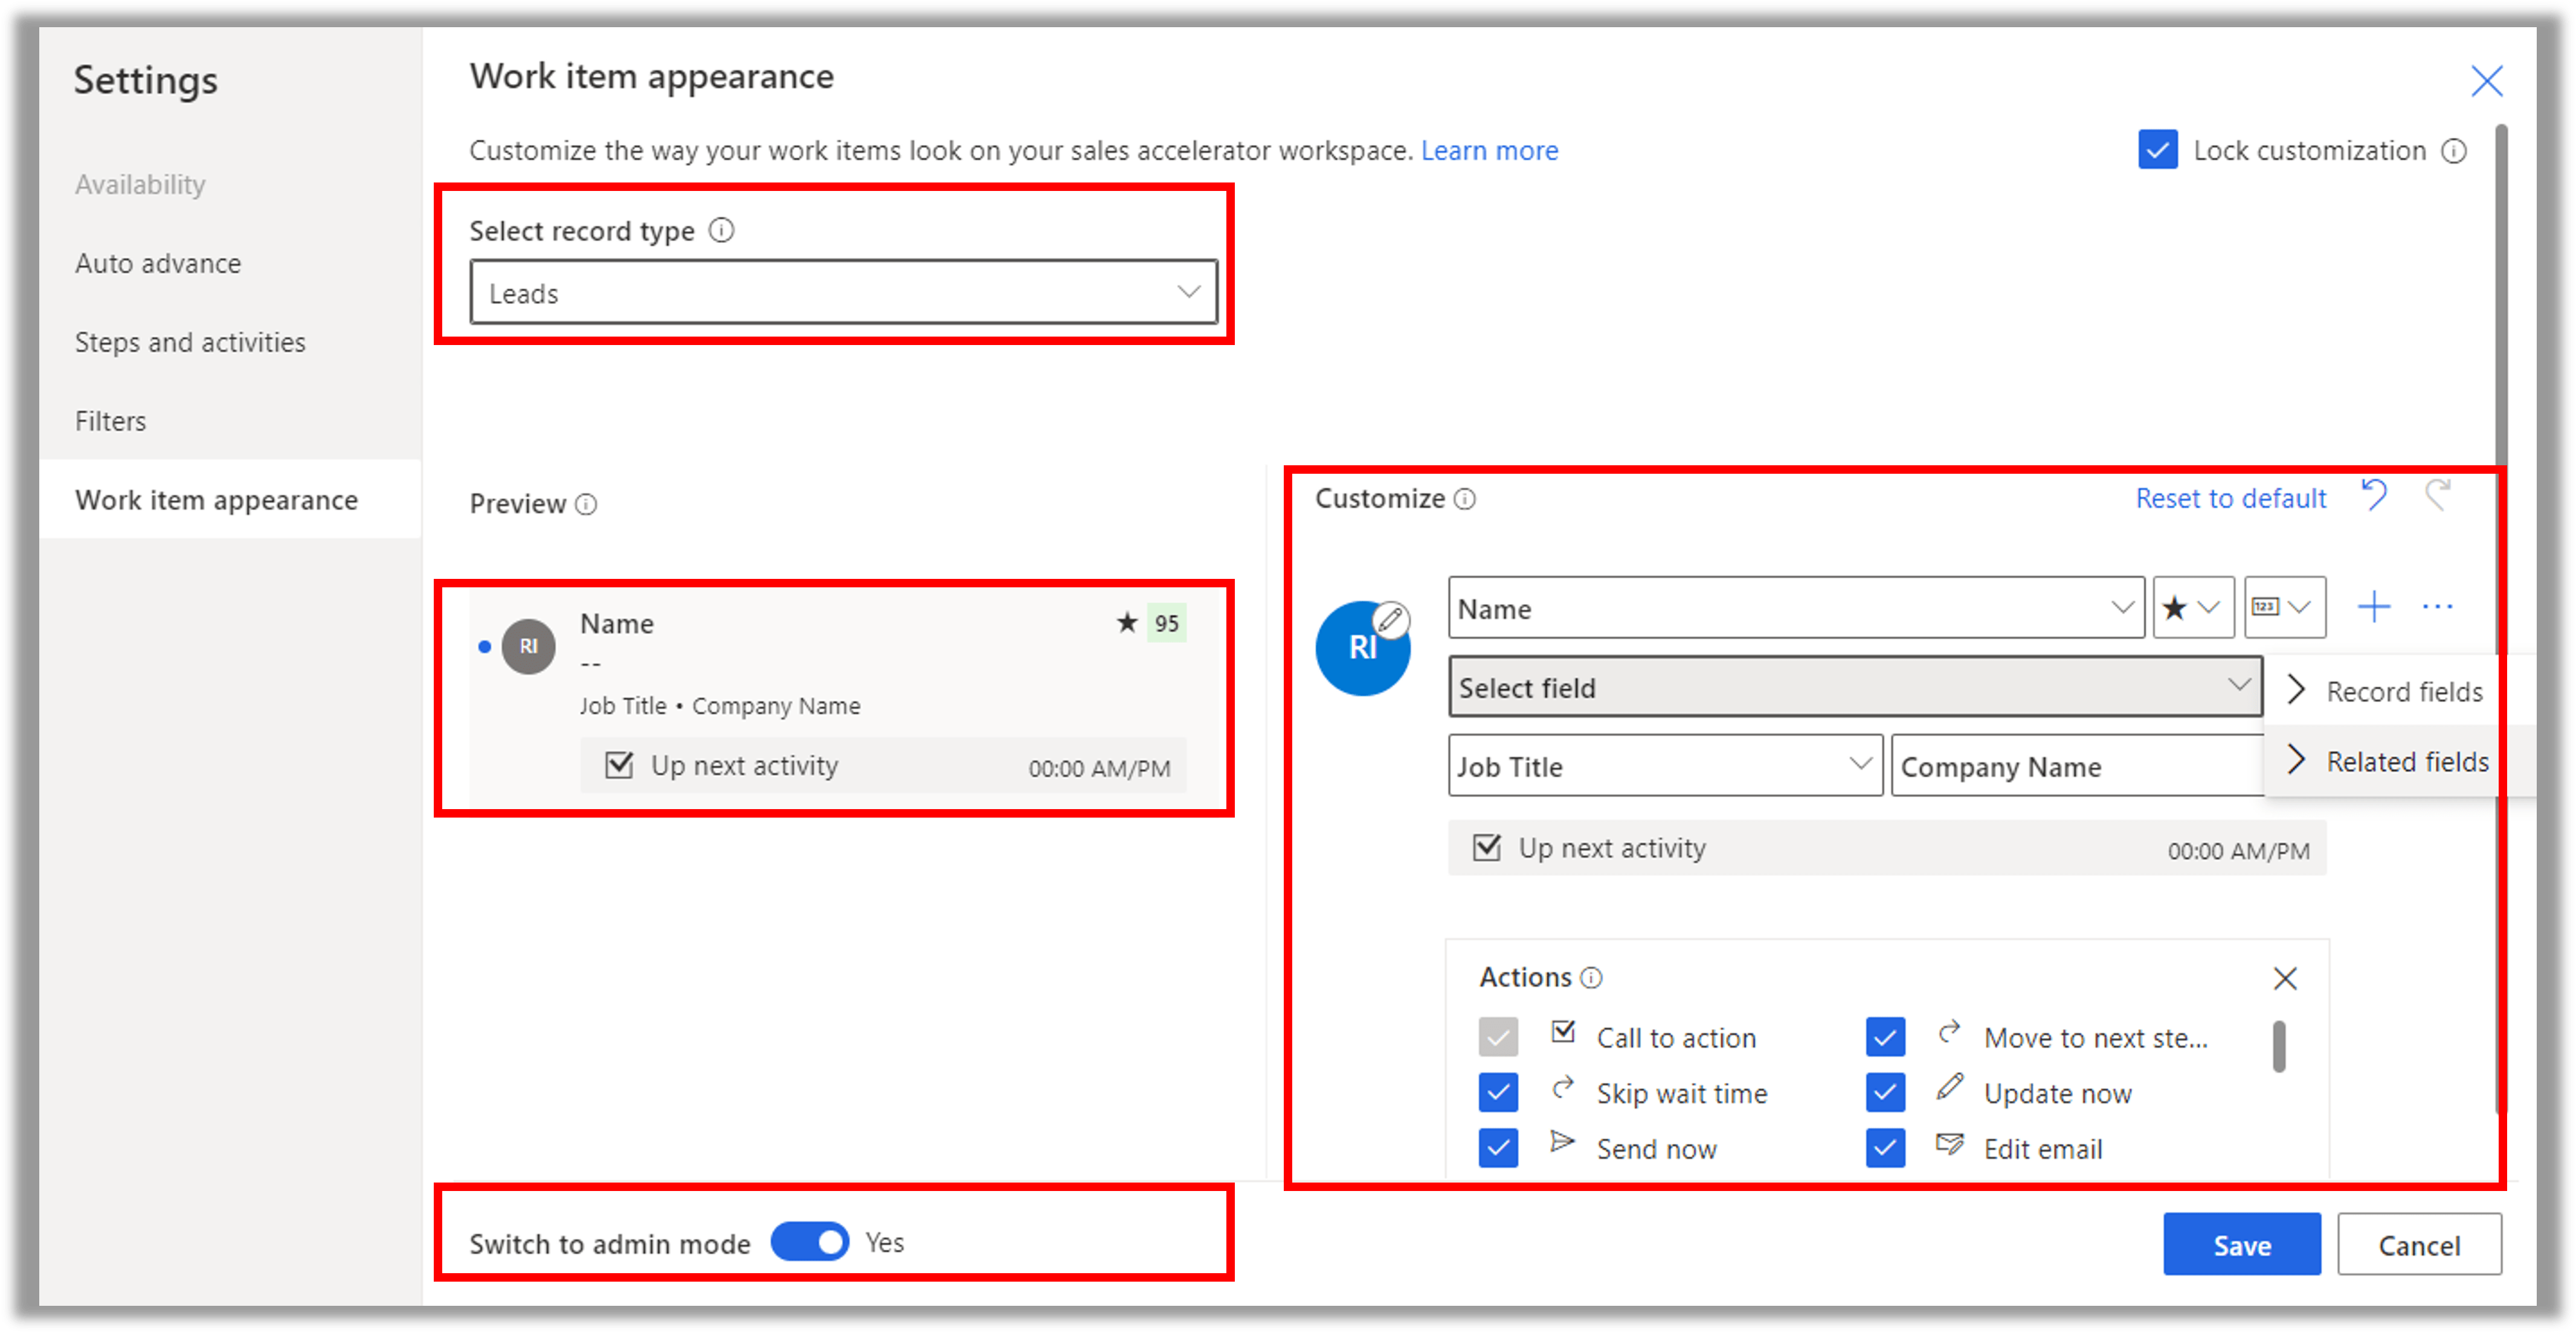
There are actually quite a few things that can be configured here! When you click on the pencil icon next to the image icon below the customize section, you’ll notice you can choose what should appear in the icon. This could be the record image, the record initials (shown on the image above), the record type icon or the activity type’s icon.
We can also add new fields, and/or change or remove any of the existing fields on the card. You can change an existing field by just clicking on the arrow down on the right side of the field name and selecting a different field. I love the fact that besides fields from the actual table, we can also pull in fields that have a 1:N relationship with the table. For example if we would want to pull in the potential customer on a card related to the opportunity table, we can because there is a 1:N relationship between accounts and opportunities. When you hover your mouse on the right side of the fields, follow indicator or icon you’ll notice three dots will show with some additional options. From here you can add a second and third ‘mini’ field on the same row (similar to the job title and company name fields on the screenshot above). The maximum number of fields in a row seems to be three, while the maximum number of rows on a card is four. That brings the total number of fields that can be shown on a card to twelve!
You can add a new row by clicking on the + button on the right side of the screen.
Besides rows and fields, we can also add icons to a card. The icon can show the follow indicator or the predictive score for that record. (Assuming the record has a predictive score to be shown)
Lastly you probably noticed the ‘Lock Customization’ check box on the top of the work item appearance window. If you hover your mouse over the information icon next to it, it reads: ‘When you lock customization and save, it prevents sellers from further customizing the work items. The changes you save will be applied for all sellers.’ This seems to suggest that by unchecking this box sellers can configure/customize only their own cards? Interesting! When you’re done with the configurations don’t forget to hit the save button on the bottom right of the page! No publishing needed! I hope you found this article informative! Be sure to check in again next week for a new article or subscribe here to never miss another post!


Comments are Closed