


App Profile Manager

The App Profile Manager is something that is completely new, this feature was added in September. It gives system administrators another tool to add configurations to an app. The app profile has nothing to do with the data users are accessing through the app (as you know this is handled by security roles), but it is focused on giving people access (or preventing access) to certain items and functionality in the app. With the app profile manager, system admins can create custom profiles with specific session templates, conversation channels, and productivity tools. These profiles can then be assigned to system users. Currently the app profile manager can only be used for multi-session apps like the Customer Service Workspace app (which is currently in preview), but I’m guessing this will be expanded to other (multi-session) apps in the future. Being able to configure app profiles where we can turn certain things on and off in an app makes it a lot easier to create different experiences for users without the need to create separate apps. I.E an app for an agent and/or another app for a supervisor.
Configurations available
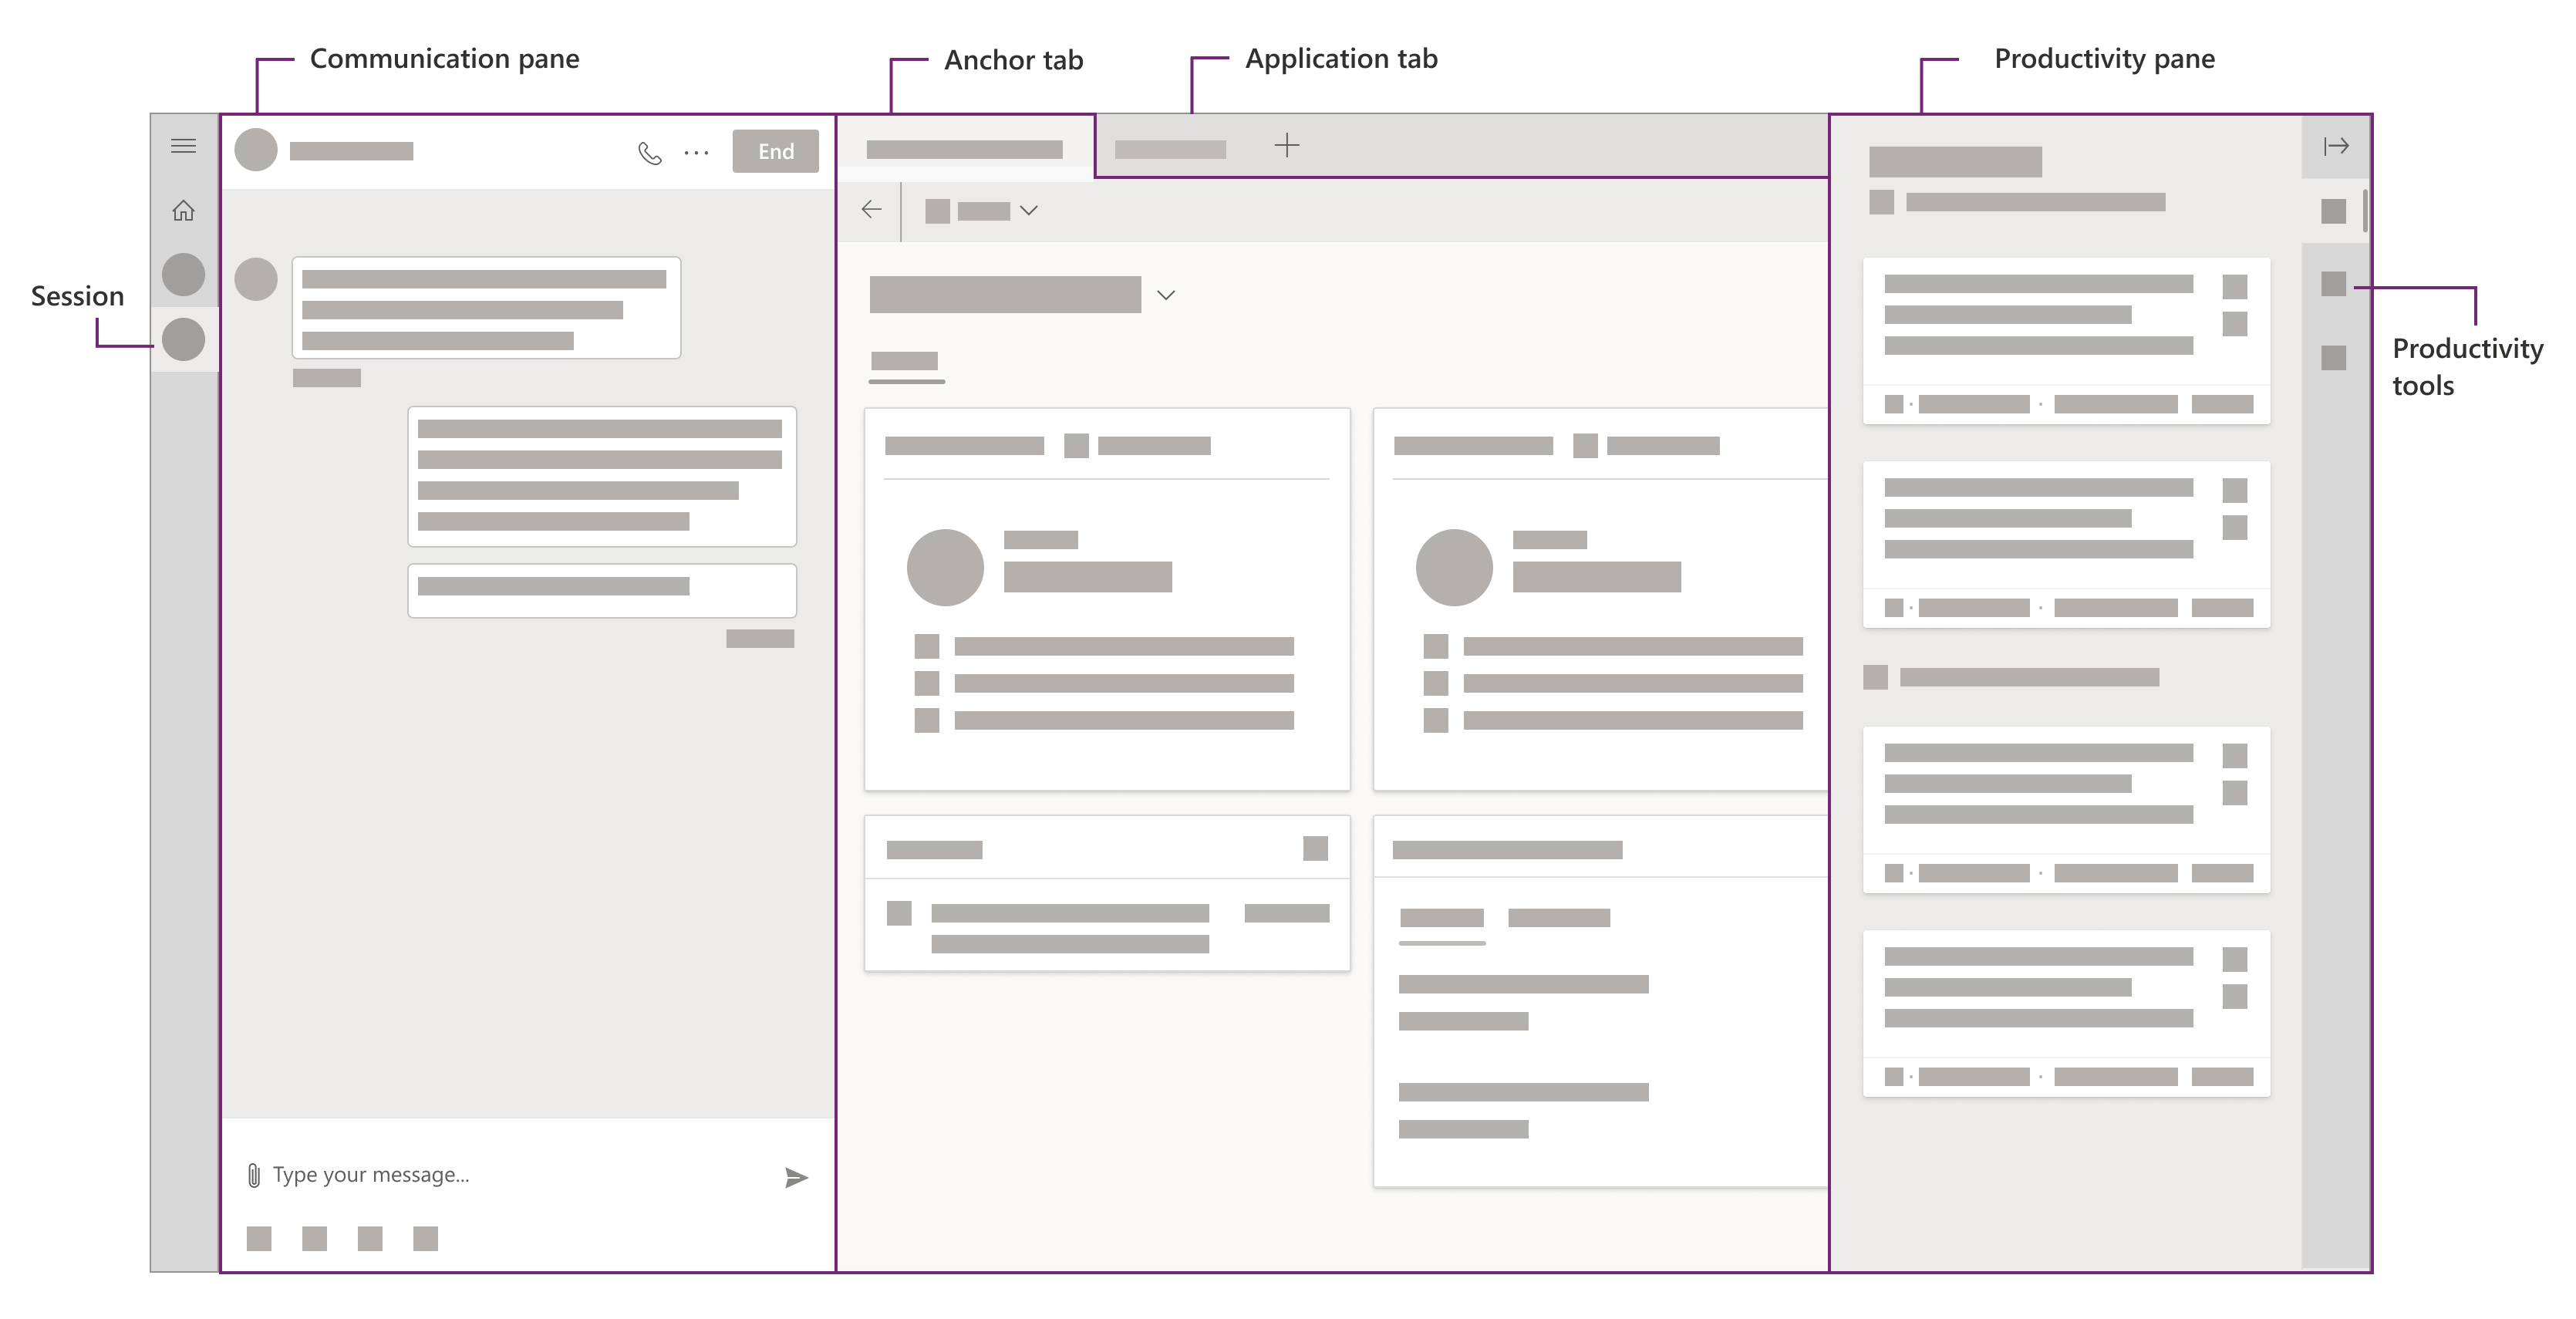
There are several things that can be configured in the app profile manager. Take a look at the image below to get a better understanding of what is available. Keep in mind that some of these features are only available in Omnichannel for Customer Service, like the communications pane. This is the pane where agents can have a live conversation with a customer for example via chat or facebook messenger or other channels that have been configured. Customer Service Workspace doesn’t have any of that functionality (yet?), which is why that pane will not be available.
Application Tabs
The application tab panel holds any application tab templates we have created, configured and associated to the app profile. In the application tab template we can configure what type of information shows in the tab. Below is a list of the different types of application tab templates available :
- Entity list
- Entity Record
- Web Resource
- Control
- Dashboard
- Search
- Third Party Website
Each time a session loads, all of the tabs assigned to the app profile will be loaded for users that have the app profile assigned to them. Each session has at least one tab that can’t be closed by the user. This tab is called the Anchor Tab. Click here for more information.
Productivity Pane
We have the option to configure if we want to show the productivity pane or not. If you turn the productivity pane on, there are some additional options you have which I will discuss later in this article.
Accessing App Profile Manager
This was a little hard to find! I looked online but I didn’t think it was very clear where to go to get to this, which is also another reason why I wanted to write this article. In order to access the App Profile Manager you will need to navigate to https://make.powerapps.com (make sure you select the correct environment), then click “Apps” on the right navigation pane. Click on the ellipse on the right side of the app (Omnichannel or Customer Service Workspace) and click ‘App Profile Manager”. If you try this on any other app you will see that the option to open the app profile manager isn’t available.

When the app profile manager page opens, you’ll see a few things. The homepage has a get started area where you can review your current app profiles and create new app profiles. There are also quick links on the bottom to webpages with more information about the app profile manager, links to the ideas forum, community page and a link to the release notes. On the right hand side is the site map which shows a link to the home screen, app profiles, and links to the Customer Service Workspace app and Omnichannel app (If you have these installed). From here you can access several areas from both apps like settings, channel providers, session templates, application tabs, etc. It’s interesting to note that when you open any of these setting for the Customer Service Workspace app, you’ll be taken to the Customer Service Hub, as this is where the settings for the Customer Service Workspace app live.

When you click on App Profiles on the left hand side, you’ll notice that there is already a default profile for the Customer Service Workspace app. The system profile can’t be edited, but you can still review how it has been configured and the features that are available for configuration. When you open the app profile you will see four tabs:
General – This section holds the the name of the profile and a description field were you can explain what is configured in the profile.
Session Template – When a new session is opened, (clicking and holding down the shift key at the same time) a session template is loaded. Here is where you define the session template that will be loaded for users that have this app profile assigned to them. A session template is not an entity form, it’s where we will configure several things related to the session, I.E tabs that will be loaded, during the session, the entity (or channel) related to the session (I.E cases), the session title (which is what will show as the name of the session tab on the left when a new session is opened) We can also create and link agent scripts to session templates. More information on session templates can be found here.
Productivity Pane – In this tab we can decide if we want to show the productivity pane on or off and if it needs to be expanded or collapsed by default. Under Productivity tools we can turn the knowledge search tool on or off, turn smart assist on or off and turn the call script tool on or off. When turned on, these will show as separate items/buttons on the productivity pane.
Channels – This is where you can setup conversation channels, like SMS, Facebook, etc. This if currently only available in Omnichannel for Customer Service, which is an add-on to Dynamics 365 Customer Service. This is also where you can configure voice channel providers.
Assign Users
In order for people to start using the application you will need to assign an app profile to the users. If you don’t do this, there might be certain features that won’t be available. For example the productivity pane might not load. In order to assign users to a profile, open the profile you want to assign users to, then click the ‘Add Users’ button on the command bar. This will open another page in the unified interface where you can add the users to the app. It’s important to know that users can only have one profile assigned at a time. If you try to assign a second app profile, an error message will show stating “<User Name> is already assigned to another profile. A user can only have one app profile. If you’d like to move this user, please remove the user from Custom Profile and try again.” For more information on the App Profile Manager check out the docs site here.
I hope you enjoyed this post! Be sure to check in again next week for a new article or subscribe here to never miss another post!


Comments are Closed